INSIDE: Save money and create a unique DIY baby’s first Christmas ornament to celebrate this memorable event. You’ll love the natural, rustic feel of this adorable ornament!
Our baby boy is 6 months old, and we will be celebrating his first Christmas! It’s so fun to watch my 5-year-old and 3-year-old get so excited about introducing their baby brother to all the Christmas fun.
A little secret…I totally forgot to make my 3-year-old’s first Christmas ornament. So his sweet little handprint looks giant because he was actually 2 when I remembered to do it. ???? Isn’t that the life of a mom!
Try This Rustic DIY Baby’s First Christmas Ornament
This baby’s first Christmas keepsake ornament was super easy to make! And I created a little tutorial so you can make this personalized DIY Christmas ornament, too. Homemade ornaments and handmade decorations make the holidays even more special. (This would also make a unique gift for grandparents of a new baby.)
Baby’s Handprint on Wood Circle
~ This article may contain affiliate links. I only suggest products or services I believe will benefit my readers. All opinions are 100% mine! ~
Materials:
- Wood circle (I bought my wood slice at Michael’s for $2.99.)
- Black chalkboard paint
- White acrylic paint (Tip: Use a white stamp pad. It’s much easier to paint a baby’s hand or foot with a stamp pad. Here’s how to get a clean stamp.)
- White Sharpie paint pen
- Paintbrushes
- Pencil
- Small hook

Step 1:
First use a pencil to draw a circle (the outline of the background). I left a little room between the edge of the wood and where the background circle would start. It’s pretty easy to freehand draw a circle on the wood. You can just follow the natural rings in the wood.
Drawing the circle in pencil will act as a border for the paint.
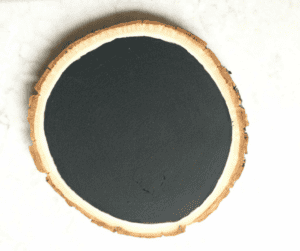
Step 2:
Next paint the circle with your black chalkboard paint. Let the paint dry for about 15 minutes. It doesn’t take very long to dry!
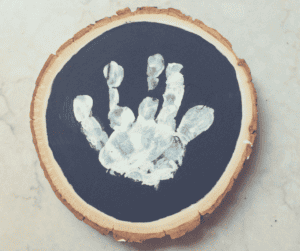
Step 3:
Now grab your wiggly sweet baby and cover the palm of his hand in white paint. It’s a good idea to have someone help you distract the baby while you get the handprint.
I laid him on the changing table and had my 5-year-old play with him, while I quickly painted his hand and pressed it on the wood. You’ll also want some wipes nearby to clean those little fingers quickly, then wash baby’s hand in the sink.
Full Disclosure: The handprint didn’t come out as perfect as I wanted it, so I grabbed my 2-year-old and used his fingers to fill in where it didn’t get the whole handprint. Then I used the black paint to “touch up” a few spots where white paint had gotten out of control!
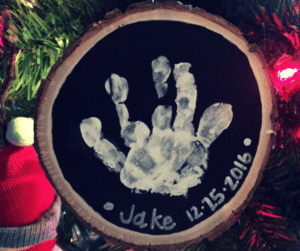
Step 4:
After the handprint dries, use the paint marker to write baby’s name and the date. I chose to write his first Christmas, but I guess you could write baby’s birthday if you wanted.
Last, you can screw the hook into the wood and tie a red satin ribbon onto the hook. Then hang it on your Christmas tree!
This wood slice ornament is just one example of upcycling materials to make cheap decorations for Christmas that are extra special.
Final Thoughts About This DIY Baby’s First Christmas Ornament
I love how my baby’s little handprint ornament turned out. Even though the days are so long (especially when he’s teething), I know one day I’m going to miss the sweetness that is this season of life. Hope you and your family have a Merry Christmas and are able to slow down and enjoy the moments during the busy holiday season!
What are your favorite DIY crafts that save you money during the holidays?
Homemade Christmas crafts are one of the best things about Christmas.
Here are some additional holiday craft ideas for you:
Homemade Christmas Crafts to Sell on a Budget
27 Unique Projects to Sell at a Holiday Craft Show
Easy DIY Holiday Crafts to Sell
DIY Wreath Ideas to Make and Sell for Profit
Adorable DIY Pallet Projects for Christmas
We want to hear your ideas! Please share them in the comments.
This is adorable! I love the rustic look of the wood. I’m going to do this project this weekend with both my kids!